Add a Program to Your Allow List
If you use remote access programs for work or to help family members with tech support, Seraph Secure offers an Allow List where you can add designated remote access software exceptions. This will prevent Seraph Secure from alerting for and blocking the specified software.
You can add programs to your Allow List from the Seraph Secure application itself.
Premium users can also:
add websites to their Allow List
manage the Allow List from their Seraph Secure account dashboard.
Warning! Scammers may try to convince you to add items to your Allow List so that they can gain access to your computer.
If someone you don't know personally is telling you to add things to your Allow List:
• Stop communicating with them
• Seek advice from someone you know and trust
From the Seraph Secure Application
Note: You will need your 5-digit Admin PIN found on your Account Profile Settings if you are a premium user.
1) Open the Seraph Secure Home screen (See How To: Open the Home screen).
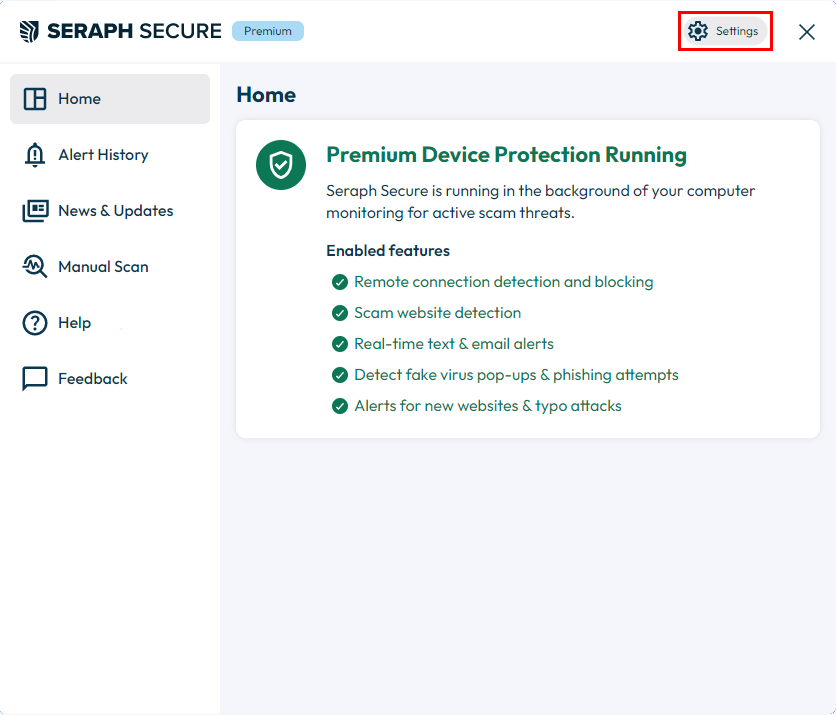
2) On the Home screen, click the Settings button on the top of the Home screen.
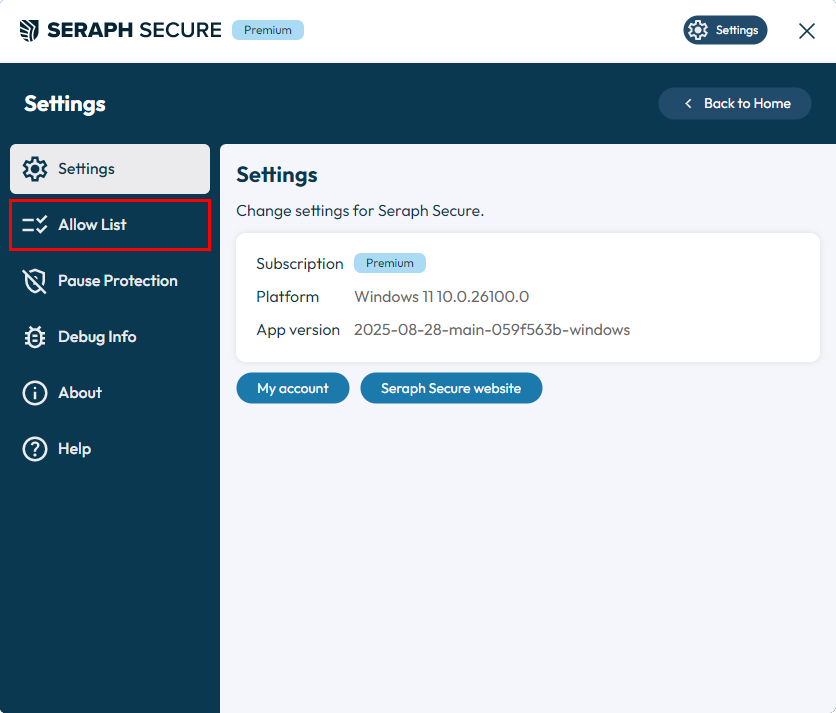
3) On the left of the Settings screen, click Allow List.
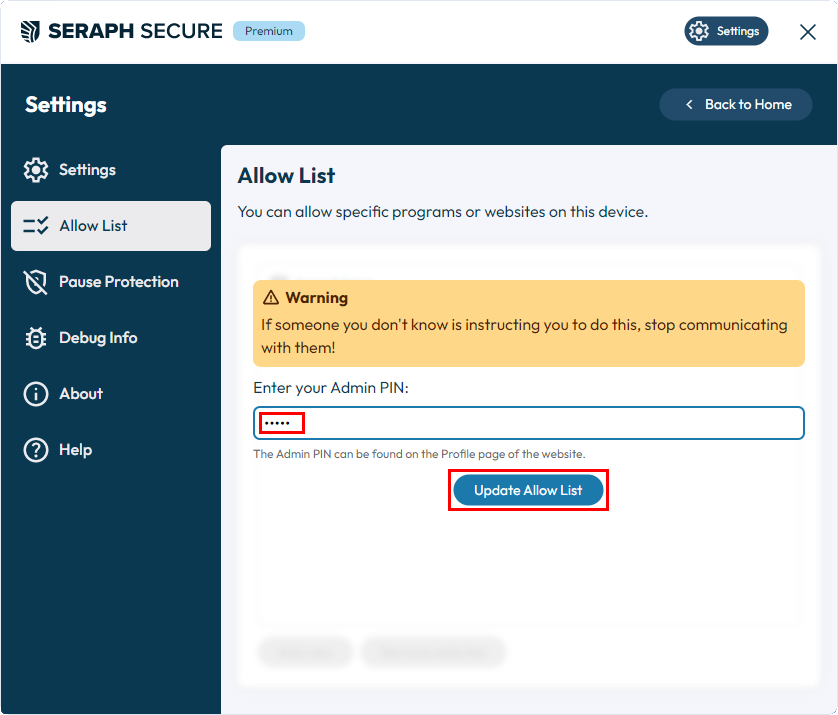
4) Enter your Admin PIN [premium users only]
5) Click the "Update Allow List" button.
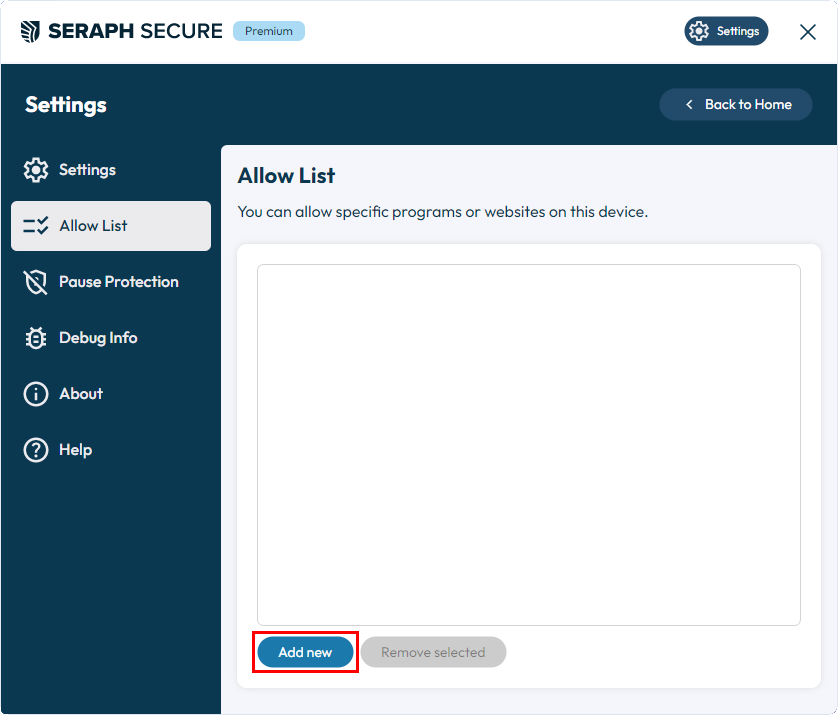
6) Click the "Add new" button
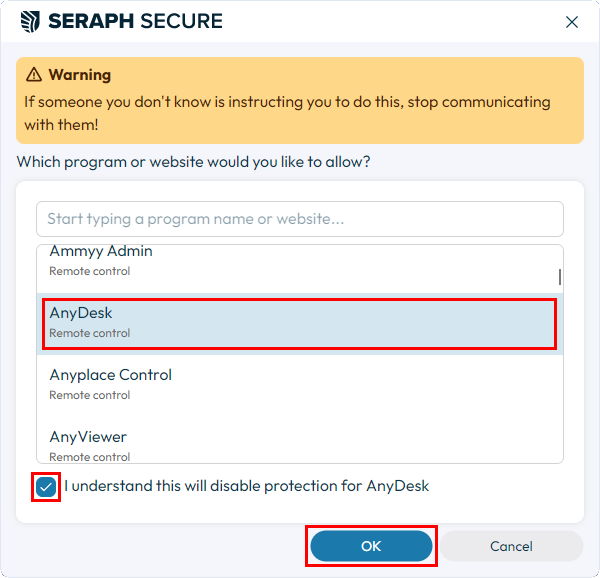
7) Select the software [or, if you are a Premium user, type the website] you want to allow. Check the box to verify you understand this will disable device protection for the selected software and hit OK.
From your Account Dashboard [premium users]
1) On your device list, click Manage for the device you'd like to add an exception to which will open up Device Settings.

2) On the Device Settings page, click on Allow List on the navigation bar (top right).

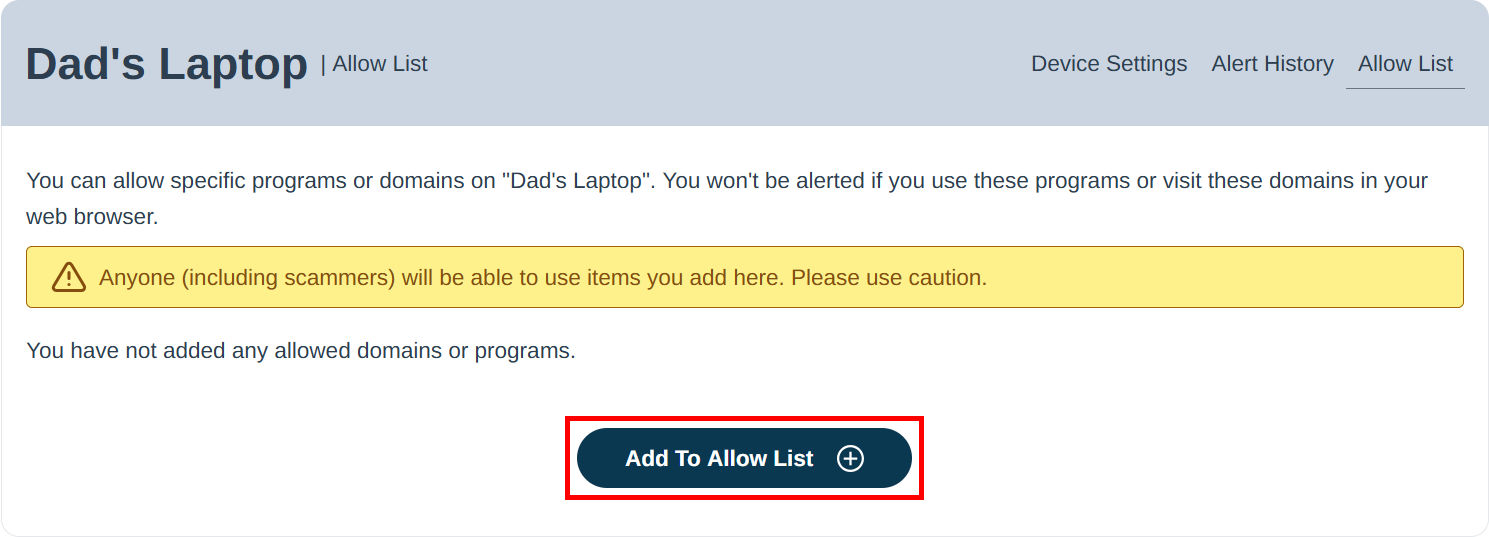
3) Click the "Add To Allow List" button.
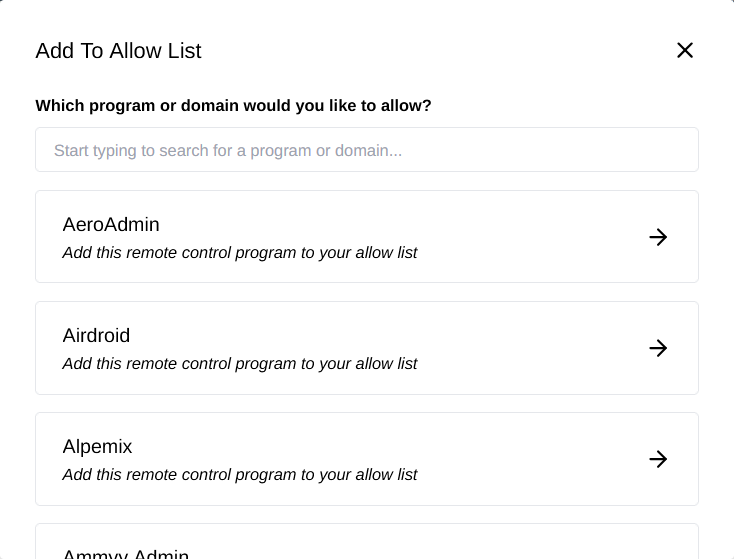
4) Select the software from the list, or type the website you want to allow.
Note: Changes made from your dashboard can take up to an hour to go into effect on the device. You can restart the device for the change to be immediately applied.

